vampiricrogue
Retro Braniac
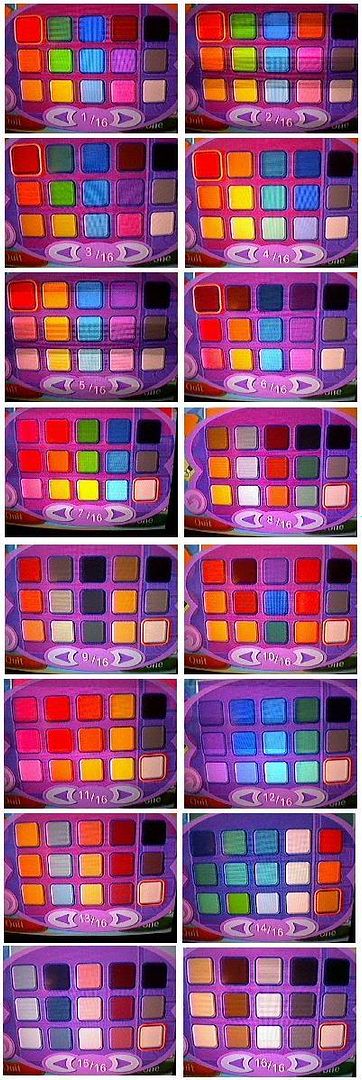
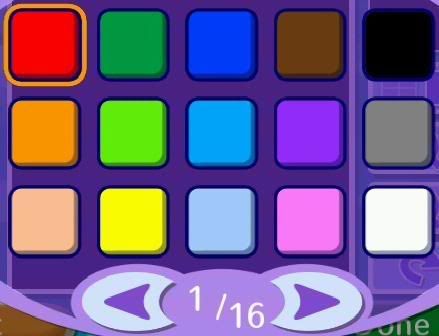
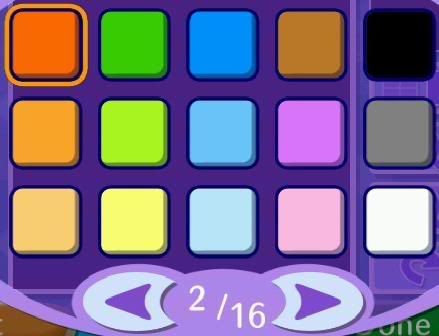
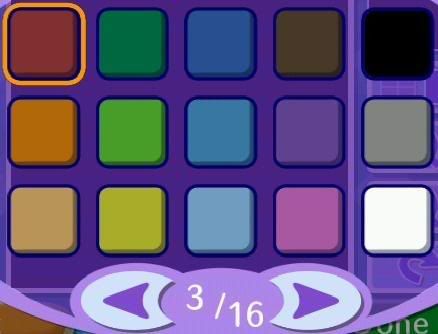
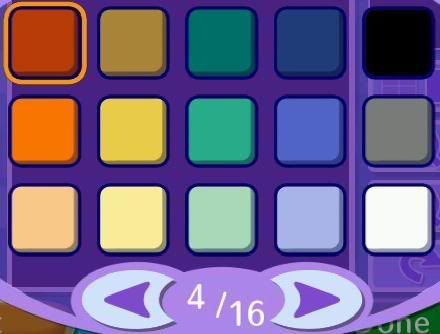
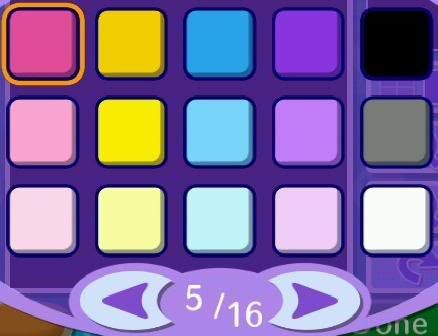
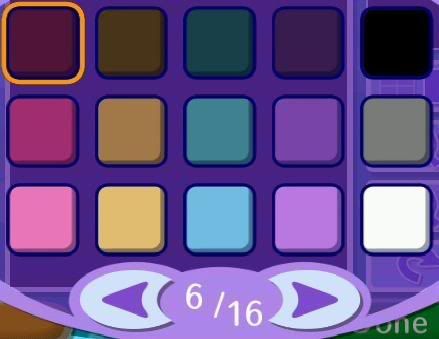
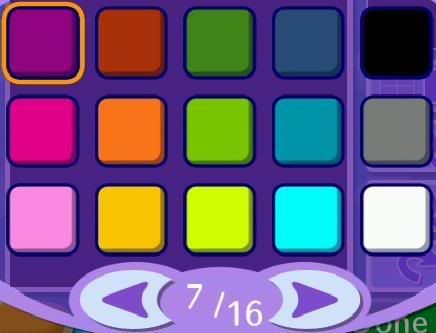
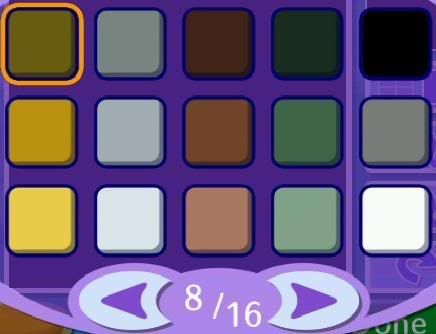
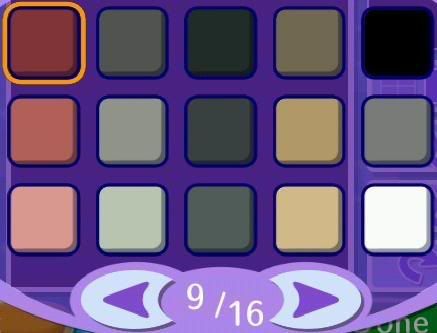
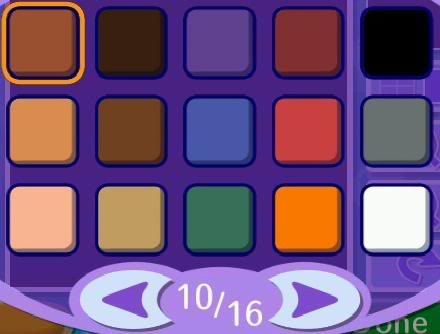
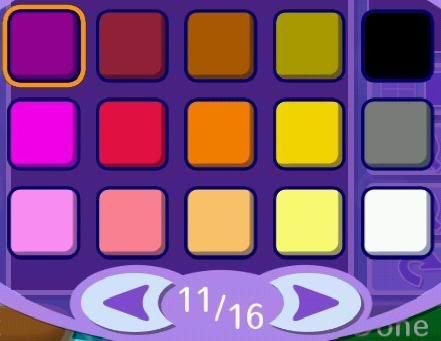
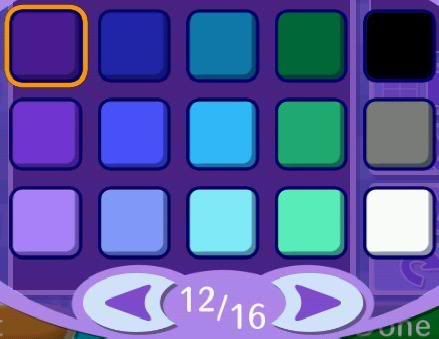
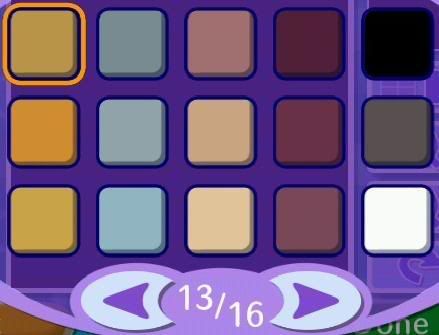
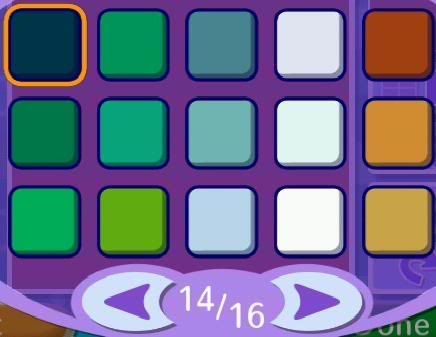
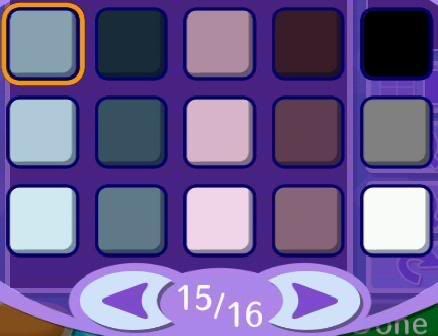
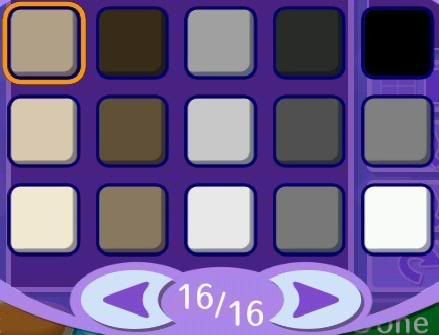
I didn't see a guide on here on the color charts, just what people made from them. So I will post up a couple images of just the charts so people don't have to constantly look back and forth between one thing to the next.
The first step into making a pattern on animal crossing is to understand artwork to some degree. Although not everyone has the ability to learn such a task does not mean that you still can not gain the knowledge in how until the day you feel like trying it yourself. If you wish to copy along this particular post with your own sheet of paper and pencil, then your more then welcome to.
Think of this as Drawing101, but you do not have to pay $385 up front to any collage course to do so.
Below you will see basic shapes that you may or may not recognize. I will label each one as we go along.
Circle

Triangle
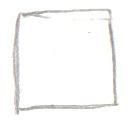
Square
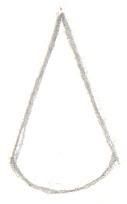
Cone
Basic shapes, yet somehow they are missing character. Well, that is easy to fix... and i am not just talking about putting it in 3D, but shading it, and shadowing it.
Sounds hard, but it is actuilly quite simple. What you do is take a look around you. The shapes I listed are everywhere, and even more that I did not list. Simple observation of one item can lead to thousands of possibilities. Although I will not be teaching you how to draw animie or "correct" human artwork, I will at least be teaching you how to vision objects around you and use it to your advantage.
The first thing that you will observe is shading. What crates shading in a real object is no different then what creates shading in said artwork, this includes animal crossing patterns. What you do is start with a light, contacted squiggle, and gradually add pressure as you continue down the paper to make said lines darker. This is what we will call a shade twister (mainly because when your done it just might look like one, although you can tell I purposely exaggerated my example for humor.)
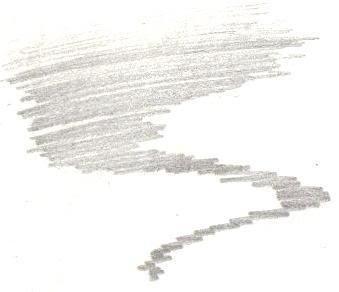
Start light and work your way to dark first, this will take several tries to get it right, or even several pages if you have nothing else to do.
Next, you look once again to said shape... let's use the cone as an example.

So lifeless, and yet, using this shading placement, you can create it into a 3D object in no time!
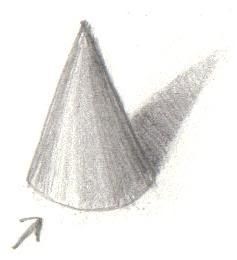
The arrow represents the direction the light is coming from. It will serve as a mental guideline to assist you on your quest to create good looking shapes for your practice sheets.

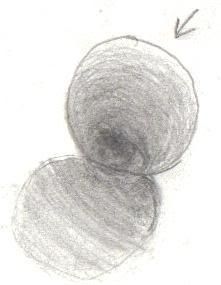

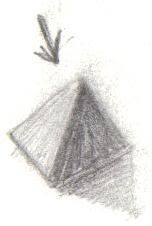

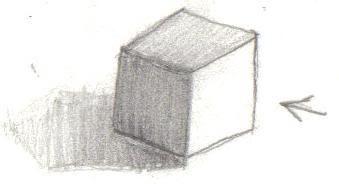
Notice that as the shape is designed depends on how the shading takes effect. On a round surface, it gradually turns dark to the area where light is not directly facing it. The square for example with its many sides, is one of the easiest to work with. You have solid, flat colors on each side of the cube without the real effect of fading around a said round surface (like the cone or the circle). The flat side, facing away from the arrow, is the darkest part, while the side of the cube itself tends to linger in the center due to light from the other direction (also indicated by an arrow).
Using this basic idea, you can combine any shape you want to put together, and create 3D looking effects.
Now at this point you may be wondering what does this have to do with animal crossing patterns? Plenty, especially if you want to perform something like this:
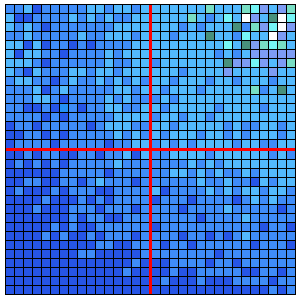
This is the image I created a couple days ago for the Atlantean Knights group on the TBT, as a base background before all of the forwards are put in. The image is of the sun beaming down into what appears to be a mass of water... gradually going lighter as you look up to he surface... doesn't the sun look promising from down here?
The first step into making a pattern on animal crossing is to understand artwork to some degree. Although not everyone has the ability to learn such a task does not mean that you still can not gain the knowledge in how until the day you feel like trying it yourself. If you wish to copy along this particular post with your own sheet of paper and pencil, then your more then welcome to.
Think of this as Drawing101, but you do not have to pay $385 up front to any collage course to do so.
Below you will see basic shapes that you may or may not recognize. I will label each one as we go along.

Circle

Triangle

Square

Cone
Basic shapes, yet somehow they are missing character. Well, that is easy to fix... and i am not just talking about putting it in 3D, but shading it, and shadowing it.
Sounds hard, but it is actuilly quite simple. What you do is take a look around you. The shapes I listed are everywhere, and even more that I did not list. Simple observation of one item can lead to thousands of possibilities. Although I will not be teaching you how to draw animie or "correct" human artwork, I will at least be teaching you how to vision objects around you and use it to your advantage.
The first thing that you will observe is shading. What crates shading in a real object is no different then what creates shading in said artwork, this includes animal crossing patterns. What you do is start with a light, contacted squiggle, and gradually add pressure as you continue down the paper to make said lines darker. This is what we will call a shade twister (mainly because when your done it just might look like one, although you can tell I purposely exaggerated my example for humor.)

Start light and work your way to dark first, this will take several tries to get it right, or even several pages if you have nothing else to do.
Next, you look once again to said shape... let's use the cone as an example.

So lifeless, and yet, using this shading placement, you can create it into a 3D object in no time!

The arrow represents the direction the light is coming from. It will serve as a mental guideline to assist you on your quest to create good looking shapes for your practice sheets.


Notice that as the shape is designed depends on how the shading takes effect. On a round surface, it gradually turns dark to the area where light is not directly facing it. The square for example with its many sides, is one of the easiest to work with. You have solid, flat colors on each side of the cube without the real effect of fading around a said round surface (like the cone or the circle). The flat side, facing away from the arrow, is the darkest part, while the side of the cube itself tends to linger in the center due to light from the other direction (also indicated by an arrow).
Using this basic idea, you can combine any shape you want to put together, and create 3D looking effects.
Now at this point you may be wondering what does this have to do with animal crossing patterns? Plenty, especially if you want to perform something like this:

This is the image I created a couple days ago for the Atlantean Knights group on the TBT, as a base background before all of the forwards are put in. The image is of the sun beaming down into what appears to be a mass of water... gradually going lighter as you look up to he surface... doesn't the sun look promising from down here?
