• Come and see the official gallery showcasing all of your creative entries from The Bell Tree Fair 2024. In addition, the winners for the final raffles have been drawn! Click here for the event's final closing announcement.

Clothing My New Leaf Runway (Brick Bridge Path)

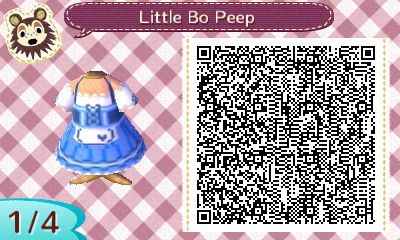
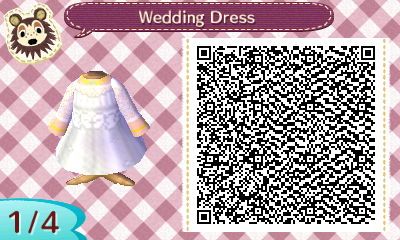
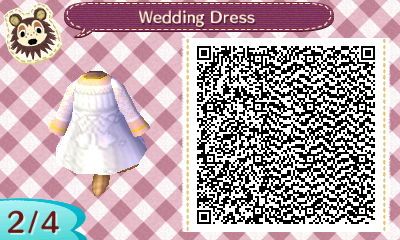
Thank you very much for liking the newest dress and wearing the plaid shirts Blue! I think you are one of the few who actually wear them and I'm grateful to you. ^^
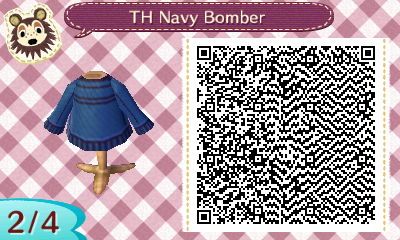
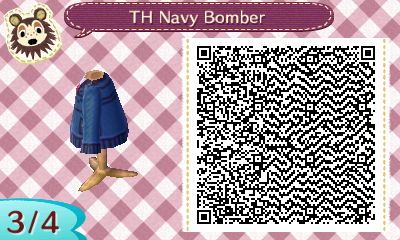
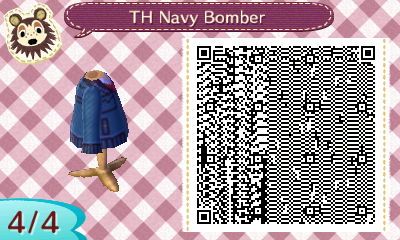
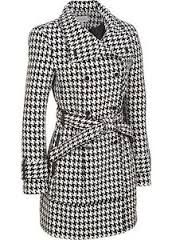
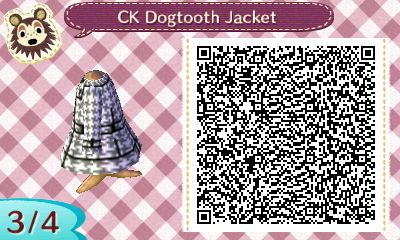
Right now I am planning to work on mimicking real life fashion into my designs. I have my eyes on a new CK jacket (women's) and a new Tommy Hilfger jacket (men's). The women's jacket is going to be black and white dogtooth pattern and men's is a navy blue bomber's design. Lemme know if you think it's a good idea and if I should post them on here.

No problem, that's really sweet of you to say! I'm wearing the red plaid shirt with jeans today.
I like your design ideas, they sound stylish. I think you should go for it, and if you do of course it's a good idea to post them! I'm looking forward to what design you do next. :)
 
No problem, that's really sweet of you to say! I'm wearing the red plaid shirt with jeans today.
I like your design ideas, they sound stylish. I think you should go for it, and if you do of course it's a good idea to post them! I'm looking forward to what design you do next. :)
Ohh honey, you are going to like this...
This is the Tommy Hilfiger Camo-lined Double Pocket Performance Bomber Jacket:
tommy-hilfiger-jacket-camolined-doublepocket-performance-bomber_zps8fa12dd3.jpg

^ I got this for my dad recently
HNI_0002_zps4eb54490.jpg
HNI_0012_zpsbb7da26f.jpg

HNI_0013_zps9bab8134.jpg

HNI_0014_zps29ad2521.jpg

HNI_0015_zpsb59c4606.jpg

^ New leaf version, slight color variation because I cannot find the exact grey/blue color that's needed.
 
Last edited:
Awesome, I love it! It's definitely one of the best jacket qr codes I've seen. The design looks pretty much spot on to your reference and I like the color variation too. Thank you so much for posting!
 
Awesome, I love it! It's definitely one of the best jacket qr codes I've seen. The design looks pretty much spot on to your reference and I like the color variation too. Thank you so much for posting!
Thank you Blue! Also thanks for following me on Tumblr! I am currently following you as well. ^^
I'll post up the woman's coat tomorrow afternoon. The black and white dog-tooth pattern isn't easy to work with tbh. We will see if I can fix it a little before I post it.
 
Calvin Klein Multicolored Double-Breasted Jacket:
CK_zps9ec72b24.jpg

HNI_0100_zpsd6f733b6.jpg

HNI_0004_zps8495d513.jpg

HNI_0005_zps475cddf2.jpg

HNI_0006_zps7d8f8403.jpg

HNI_0007_zps9048e198.jpg

md22.gif

- - - Post Merge - - -

Since some people are eager to learn how to make designs... this weekend I am going to demonstrate drawing some patterns (example: hair circlets, flowers, ruffles, curtain effect, bows, and flowery lace).
In the end I want everyone to know my tricks in making fancy designs like these:

HNI_0065_zps11ee67d2.jpg
 
Last edited:
Thanks so much for following me back.That's a cute coat, it came out well!
I'm looking forward to the tutorials. Will you be posting any for plaid shirts? If you have time, I'd really love to see those!
 
So beautiful, can't wait! I really want a hat design
Kira I posted most of the instructions for hair hats on my Tumblr. However I'll post the instructions here tomorrow and I'll add more tips to it. If you don't know my tumblr account. I have it posted in my signature. ^^ Thanks for checking my designs out! Hopefully my tips will help you.
Thanks so much for following me back.That's a cute coat, it came out well!
I'm looking forward to the tutorials. Will you be posting any for plaid shirts? If you have time, I'd really love to see those!
Thank you Blue! xD I was worried at first because I used black on the dog-tooth pattern. So the pockets and creases wasn't showing up because they are black too.
:D And honey I'll work on the example plaid pattern for tmr... you will be surprised it's so easy to make!
 
Last edited:
:D Hi there everyone! Today we will learn how to design hair hats, flower patterns, and hair accessories.
First let's start with the basic Learning the Hat Design Grid:
Hat_zps22520aae.png

^I highlighted two sections yellow. The yellow sections in this 2D template will be pinched by the computer in order to transform the design into a 3D hat.
Let me show you how the computer pinches the 2D square into a 3D round hat:
picture003_zpsc610430e.jpg

^In this picture, I drew a huge "X" onto the design. Have you notice the corners of X tend to lean towards each other? That's because the computer pinched the corners together. When you design in the yellow section I suggest: you designs bigger patterns in the yellow sections if you want to keep things proportionate throughout your hat.

Okay now let's officially start with making hats:
A Simple Headband is:

picture004_zps095e8a48.jpg
You can make the simple headband stripe patterned, or make it into a Flower Headband.
The Flower Design is:

Roses_zpsecee58cb.png

^To create roses and flowers:
1) use circle tool to create circles and ovals
2) fill in the circles with the color of the flower
3) draw in squiggly lines to make petal-like effect with a secondary color
*tip: flower shape and petals don't have to be perfect because flowers are not perfect.
**tip 2: put flower buds next to each other and you will have a flower band (example on bottom right corner). You can use this technique in creating belts, headbands etc...

Next is creating The Head Circlet:
Hat1_zps68c211d5.png

1)Create the hairline you want on the bottom of the 2D design
2)color in the scalp with flesh color and fill in your desired hair color.
3)To make a circlet: make sure you have tons of space between the circle and the edge of the hair piece.
If the circle is too close to the edge it will look uneven because the corners are pinched (I usually leave 6 spaces in between the edge of the design and the circle).
4)To add dangling parts on the circlet: make sure the dangling parts are facing directly away from the center (the black arrow is pointing away from the center and the dangling jewels are following the black arrow).
5)And you are done with the basic circlet.
6) Add a single flower for a flower hairpin (see above on how to create roses and flowers).
And you are done:
tumblr_mzwze0N8C61sfhmsxo2_400_zps5802ede8.jpg


Extra: Sailor Reese to the rescue!
tumblr_mzwzjkvS1M1sfhmsxo5_400_zpse82cfed9.jpg

A sailor head band is created by parting the hair evenly and adding a "V" across the forehead.
Stay tuned! Tomorrow will be cloth designs.
 
Last edited:
Plaid Effect:
8x8_zps497f96dc.png

1) Draw in a 2x2 dark colored square (black in my example)
2) Draw in lighter colored squares (gray in my example) directly above, below, left and right of the dark square (black)
3) Draw in the lightest colored squares (violet in my example) directly diagonal from the starting dark square (black). You are done with the Basic Plaid
4) If you want to make it fancy: on the lighter colored squares draw in more lines following a unified pattern.
8x8_zpsae57c961.png

*Tips: You can design any plaid designs if you lay down the foundation of plaids described in steps 1-3.
** You can google "animal crossing plaid patterns" for more ideas on how to create more plaid designs.
And you are done!!
2013-07-11235406_zpsb60629b5.jpg

^pattern on page 2 of this forum
Ribboned Bow:
Ribbons_zpsb7acfd84.png

1) use circle tool and draw in an oval
2) draw a diagonal line up
3) draw in a horizontal line away from the oval
4) draw a vertical line down and connect it to the horizontal line with a decreasing diagonal line
5) draw a horizontal line back to the bottom of the oval
6) mirror steps 2-3 on the other side of the oval and draw in the creases
7) draw a inverted "Y" on the bottom of the oval
8) draw in diagonal lines with the line tool on either side of the inverted "Y"
9) close the ribbon by connecting the "Y" with the diagonal lines
* tip: try not to create sharp edges if you want fluffy ribbons
And you are done!
2013-10-07134800_zpsecd2698e.jpg

^pattern on page 2 of this forum
Ruffle effect and puffy effect:
Ruffles_zps891cd593.png

1) draw in half of an outlined shape (circle, oval, triangle, rectangle).
2) repeat the pattern and connect them
3) and you will have ruffles
Puffy Effect
Ruffles_zps4fe1df1d.png

4) draw in half of an outlined rectangle (erase the rough edges)
5) mirror the pattern on the bottom half
6) and you have a puffy effect
And you are done!
2013-08-03130836_zpsafa51a0d.jpg

^pattern on pg 5 of this forum
Curtain effect:
Curtain_zps89745cf6.png

1) start with dark grey and draw a thin vertical line
2) then draw around 3-4 lines of light grey lines next to it
3) then draw 2-3 white(or any color: depends on what's the color of your clothing) vertical lines next to the light grey lines
4) mirror this process
5) repeat the above steps until you have a curtain effect
* tip: if you use this on the bottom half of your design. You don't have to worry about this pattern looking 2D. The computer will stretch it to make it look like natural flowing curtains.
And you are done!
HNI_0024_zps4b45085e.jpg
Lace effect:
Lace_zps9b9769c3.png

Laces_zps4d84cab3.png

1) draw in diagonal lines
2) draw in squiggly lines to look like a patterned lace.
And you are done!
HNI_0025_zpsfd7ca5f0.jpg
 
Last edited:
If you follow my tips, you should have little to no trouble creating elegant dresses, shirts and hats. You can change up the design and colors. In the end you will get something totally different and beautiful:
HNI_0065_zps11ee67d2.jpg

HNI_0024_zps4b45085e.jpg

HNI_0025_zpsfd7ca5f0.jpg

HNI_0026_zps0351a19a.jpg

HNI_0027_zps36d4f991.jpg

Good luck everyone!


- - - Post Merge - - -

Awesome tips! *runs off to make plaid shirts* hehe

>8D Thanks Jelly and rock on the plaids!
 
Last edited:
The bow tip <3 Thanks so much for sharing with us!!!
Welcome Mary and thanks for checking out my thread again. xD OMiGosh... just as you said you liked the bow tip. I saw some typos in the bow instructions. Thanks for bringing that to my attention *fixes it*!
 
Last edited:
Thank you so much for posting these! I'm going to try and make a plaid shirt, I'll let you know how it turns out :)
 
Back
Top